Uninstall Smartyfi.net from Windows 10 : Do Away With Smartyfi.net
Smartyfi.net creates an infection in various dll files powrprof.dll 6.0.6001.18000, kernel32.dll 6.0.6001.18000, mspatcha.dll 6.0.6001.18000, fxsocm.dll 5.2.2600.2180, wmdrmdev.dll 11.0.5721.5262, SonicMPEGVideoS.dll 2.5.4.1041, fwcfg.dll 5.1.2600.5512, webhits.dll 1.420.2600.5512, nmasnt.dll 0, asfsipc.dll 1.1.0.3917, ci.dll 6.0.6000.16386, Microsoft.Vsa.Vb.CodeDOMProcessor.dll 8.0.50727.4927, dciman32.dll 6.0.6001.18272, inetppui.dll 0, ehGLID.dll 5.1.2700.2180, cfgbkend.dll 6.1.7600.16385Uninstall Smartyfi.net From System In Few Simple Clicks
Smartyfi.net is another type of System virus which is a malicious program gets installed automatically on your System without asking your permission. It inserts its harmful code into the registry entry and changes it for its automatic execution. It infects the data stored on System including pictures, music, videos, files and documents. There are various methods by which it can enter your System like drive-by download or free downloads, spam emails, clicking on malicious ads or pop-ups, visiting suspicious ads, etcetera.
When Smartyfi.net enters your System, it starts to create havoc inside the System. It at first disturbs the functioning of the System by altering its internal settings. This perilous virus may change the desktop icons and creates new icons. Also, it allows hackers to remotely access the System. Hence, it is not good at all to allow this malware to remain inside the System for longer time.

Method 1 : Deletion of Smartyfi.net From Firefox
Method 2 : Step By Step Guide To Open System In Safe Mode
Method 3 : Deletion of Smartyfi.net From Control Panel
Method 4 : Uninstall Smartyfi.net From Task Manager
Method 5 : Deletion of Smartyfi.net From Registry Entry
Easy And Complete Deletion Of Smartyfi.net From System
Method 1 : Deletion of Smartyfi.net From Firefox
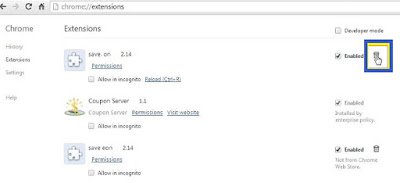
Uninstall Smartyfi.net From Google Chrome
- At first, you need to open your Google Chrome browser.
- To open Chrome menu, click on gear icon present at the top right corner of browser.
- Click on Tools then goto Extension tab.
- Under Extension tab, select all unwanted extension related to Smartyfi.net.
- Finally, click on trash bin icon to Uninstall this virus from Google Chrome.
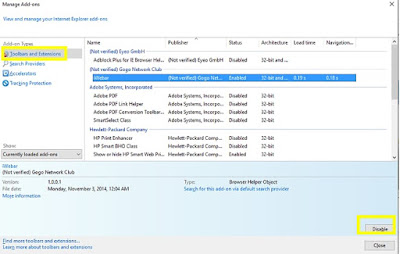
Uninstall Smartyfi.net From Internet Explorer
- Click on gear icon present at the right-top corner of the browser or press Alt+T keys to open menu.
- Click on Manage Add-ons and goto Toolbars and Extensions tab..
- Locate all the unwanted add-ons related to Smartyfi.net.
- Click on Disable button.
- Now, click More information button.
- Finally, click on Uninstall button to Uninstall the virus.
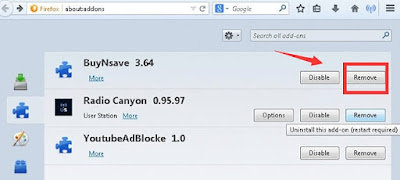
Uninstall Smartyfi.net From Mozilla Firefox
- Open Mozilla browser and click on the menu button at the top right corner of the browser.
- Click Add-ons -> Add-ons Manager tab.
- Select Extensions or Appearance panel.
- Find Smartyfi.net add-ons you want to Uninstall.
- Click the Uninstall button then restart your System.
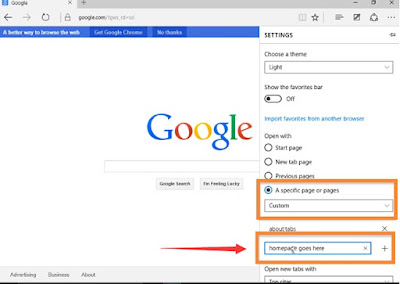
Uninstall Smartyfi.net From Microsoft Edge
- Click on More (...) icon at the top right corner then click on Settings option.
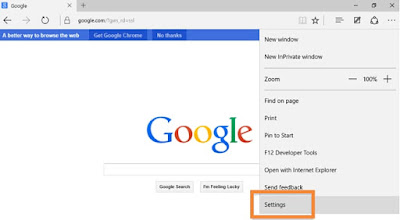
- Now, in the Open with option, click on A specific page or pages option.
- Choose Custom and type the URL which you want to set as your browsers default homepage.
Method 2 : Step By Step Guide To Open System In Safe Mode
For Win XP/Vista/7 -
- Click on Start menu and then click Restart option.
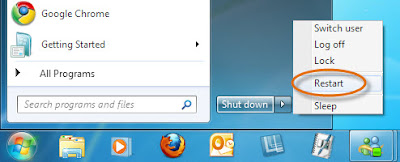
- Press F8 while System boots-up.
- Under Advanced Boot option, select Safe Mode.
For Win 8/10 -
- Press Shift key while clicking on Restart button on the Shutdown menu.
- No, select Troubleshoot - > Advanced options.
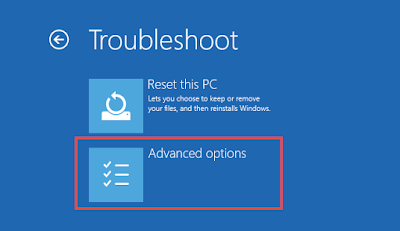
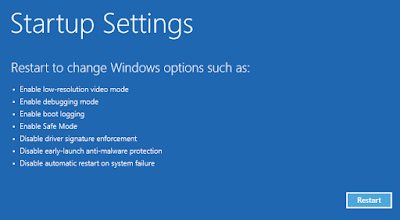
- Click on Startup Setting.
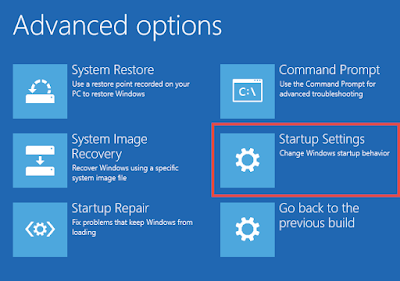
- Click Restart button.
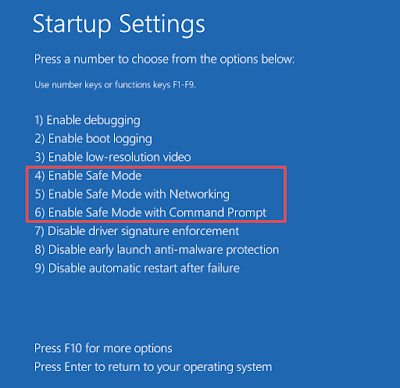
- Press F5 key for the option Safe Mode With Networking.
Method 3 : Deletion of Smartyfi.net From Control Panel
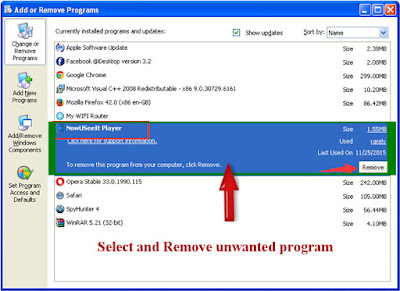
Uninstall Smartyfi.net From Windows XP -
- Click Start button and goto and click on Control Panel.

- Click Add or Remove Programs option.
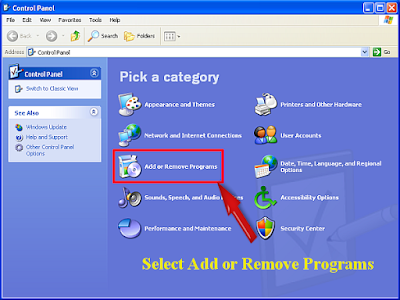
- In the window that appears, locate and Uninstall Smartyfi.net related programs.
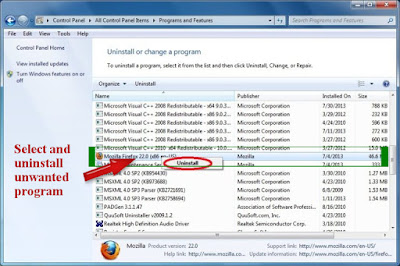
Uninstall Smartyfi.net From Windows 7 -
- Press Window key present on the keyboard.
- Click Control Panel option.
- Click on Programs option from the Control Panel window.
- Select the Smartyfi.net executable file from the list of installed programs.
- Click on Uninstall option.
Uninstall Smartyfi.net From Windows 8 -
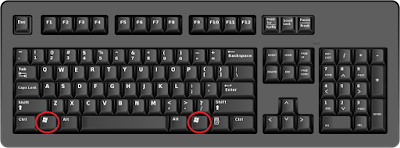
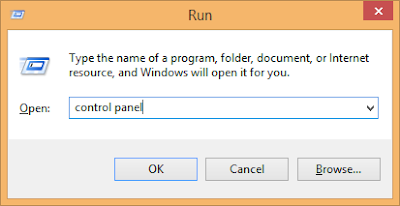
- Open run box by pressing Window+R keys together.
- Type control panel in the run box and hit Enter key.
- Click on Uninstall a Program option.
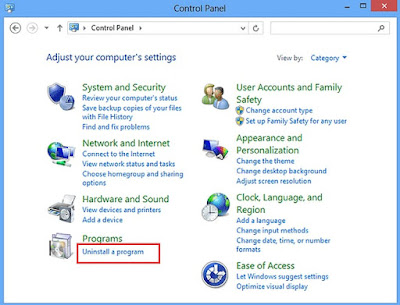
- Select programs related to Smartyfi.net and click Uninstall option.
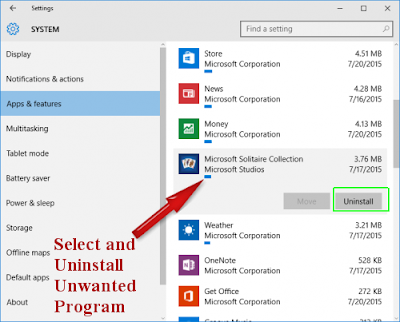
Uninstall Smartyfi.net From Windows 10 -
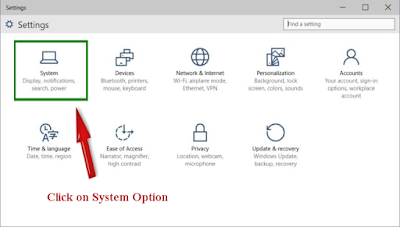
- Click on Start button and select Settings option from the Start menu.
- Select System option under Settings.
- Click on App & Features option.
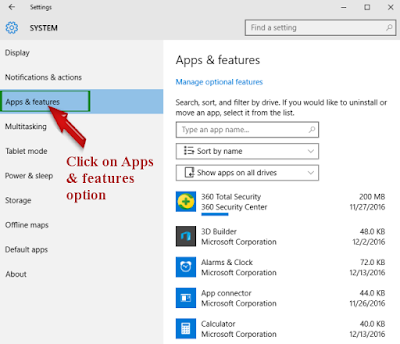
- Finally, Uninstall all the unwanted programs from your System.
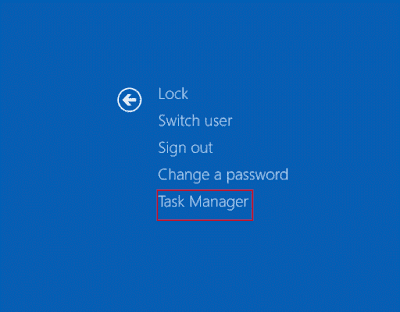
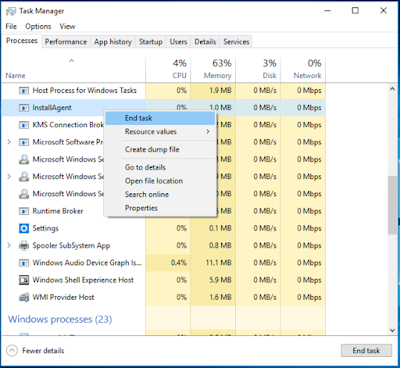
Method 4 : Uninstall Smartyfi.net From Task Manager
- Right click on Taskbar.
- In the menu, choose Task Manager.
- From the various running process, select the unwanted process.
- Click End Task.
Method 5 : Deletion of Smartyfi.net From Registry Entry
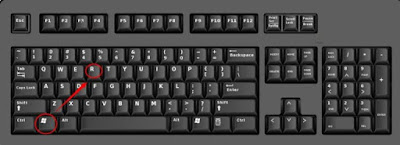
- Press Windows+R keys to open Run box.
- In the run box, type regedit and click on OK.

- Locate and remove all the registry files related to Smartyfi.net.
HKEY_CURRENT_USERSoftwareMicrosoftInternet ExplorerMain Default_Page_URL
HKEY_LOCAL_Machine\Software\ClassesSmartyfi.net
HKEY_CURRENT_USER\Software\Microsoft\Windows\CurrentVersion\Run .exe
HKCU\Software\Microsoft\Windows\CurrentVersion\Internet Settings\random
HKEY_LOCAL_MACHINE\SOFTWARE\Microsoft\Windows\CurrentVersion\run\random
No comments:
Post a Comment